Part V:
First, I need to point out that these hoof trimming techniques are absolutely nothing of my own construct, but rather are gleaned from established and well respected sources. These include Ovnicek’s ELPO trimming protocol ( http://elpo-evaluationprotocol-web.pdf,) and also information from Ramey, Jackson, AANHCP trimmers, Redden, Bowker and other various sites such as Rood and Riddle.
Most people I run across want to perform a simple and basic trim on their horse’s hooves rather than read a huge manual and memorize a lot of information. All the people mentioned above have clinics you can attend in order to gain in depth information. The intention of the information I am sharing here is to give a basic start to those who want to safely trim their own hooves. So on that note, I also want to make it clear that while these methods are safe and won’t harm a horse, every issue is not fixable and horses with big issues may need expert consultation, xrays, vet involvement and sometimes boots or shoes.
Before going into the trim itself, I will discuss how to handle the horse’s body and the tools.
First, the horse. This is your horse, so you will know the horse best. Some horses do better tied, some loose, some in a stall, some at a tie rack, some in a corral. If a horse is more comfortable near buddies, I leave him near buddies. If he stands better when eating, I’ll hang a hay net in front of him. Usually for a farrier, someone holds the horse. Most often when people trim their own horses we don’t have this luxury. I feel that many horses will stand better tied anyway than they will stand when someone is holding them on a lead rope.
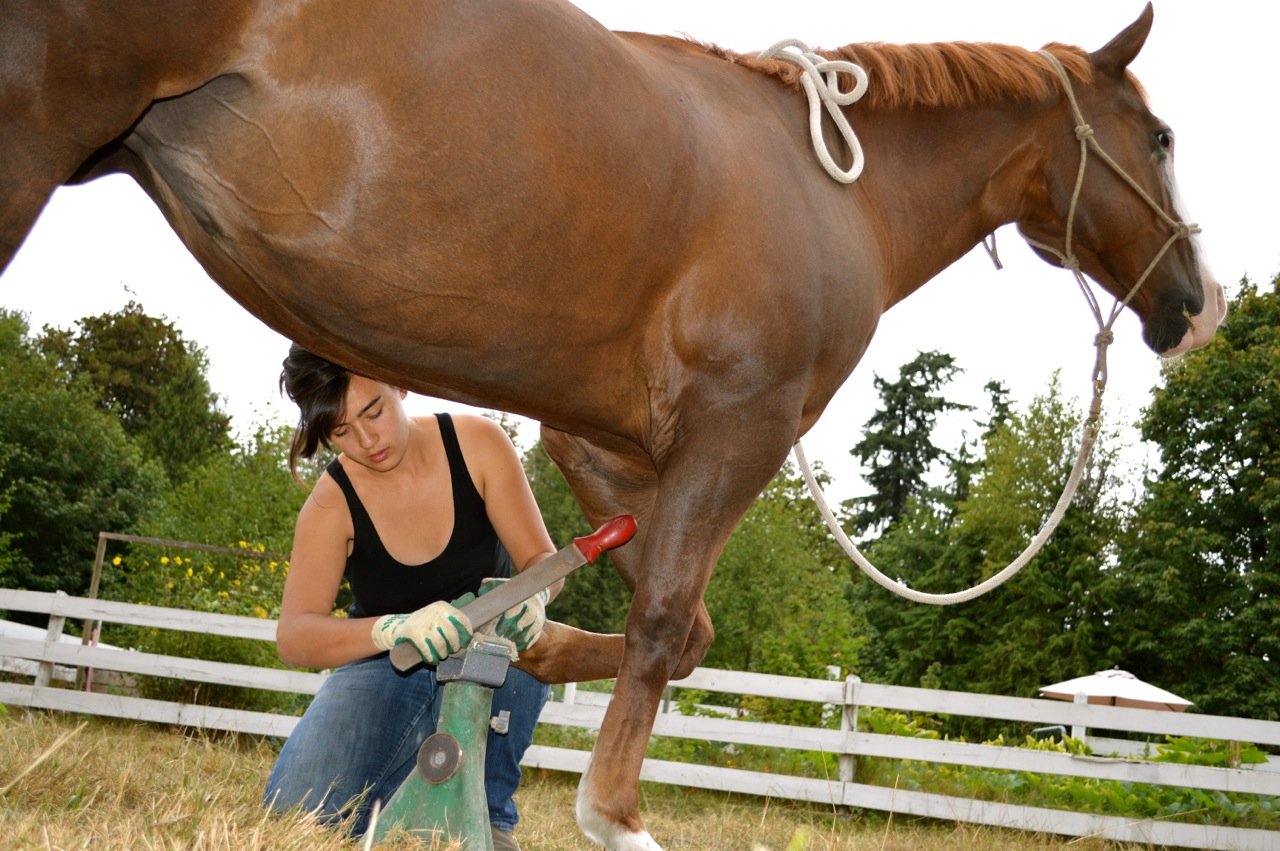
As you’ve undoubtedly seen, farriers usually stand bent over, pick the horses’ hooves up high, and wrap the horse’s legs around their leg or through their own knees. This is far too much work for me. If you pull a hind leg out and balance as the horse is pulling his leg back against your knees, your thighs start shaking in no time, even if you are in good shape. It is a strength exercise.
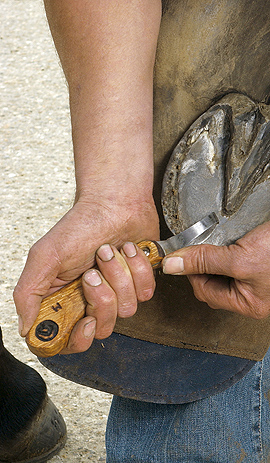
If a horse is very restless and moving around a lot, you may have to stand and bend. However, most horses will stand nicely for you, and if you can trust them to not hop around it is often much easier to kneel down and rest the hoof on your thigh like this:
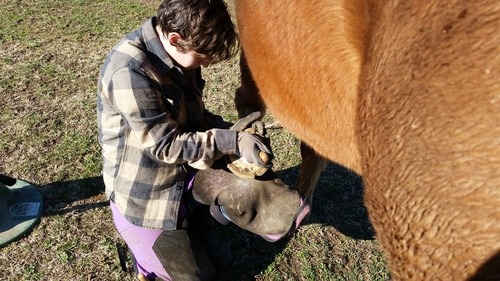
I actually kneel a little closer to the front of the horse, and always think about what is comfortable for the horse’s joints in regard to twisting out to the side. For safety, I always keep that outside leg ready, in case I have to hop up and leap to the side. You can do that or else twist and roll away if the horse seems like he’s losing his balance. I’ve had numerous horses that were not very well behaved and this position still was safe and easy to maneuver out of if necessary. It saves your back and is easier to hold for a longer period of time. You also don’t have the blood rushing into your head like you do when you’re leaning over.
Some people will even trim hooves while sitting on a stool or a bucket. It could be safe enough to do with some horses. Regardless, think about your body mechanics and how your height and build play into the matter. There’s really no right or wrong way to go about it, as long as you can sustain a position without injury.
I believe most horses prefer holding their hooves lower to the ground, so if you can manage this your horse may stand better for you than if you overflex their joints.
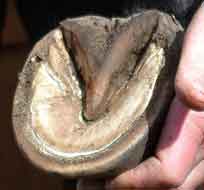
The first step of trimming is to pick out the hoof and brush it off.
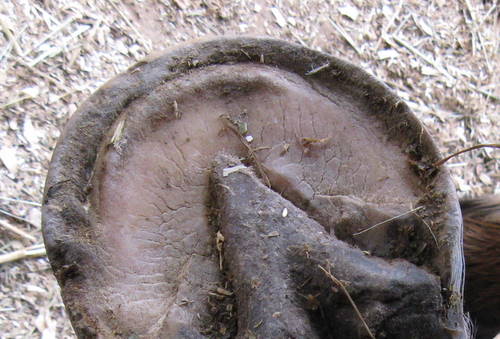
For some reason I can’t find any photos online of a hoof with the white line cleaned off, although I see farriers doing it all the time. With your hoof knife, lightly clean out the white line or the area around the sole ridge, just inside the hoof wall so you can see the outline of the sole. Your hoof should end up looking like this.
Now you can trim the bars and cut any hanging flaps off the frog (either of these can be done at any time during the trim). If your hooves are very dry, it can be very difficult to trim the bars. This is also the case if the bars are very laid over.
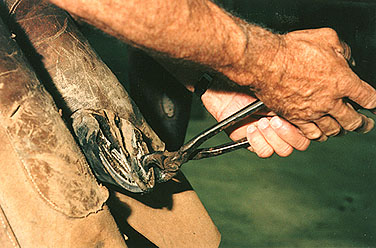
The photo below illustrates the angle I usually hold a hoof knife to trim bars (although the knife is nowhere near the bars in this pic and the sharp end is pointing the wrong way), and it works well to use both hands. Pushing the blade down with the hand not holding the knife and either pulling it toward you or pushing it away along the bar will help get a more even sliding cut. On a very hard hoof, it will sometimes seem like you’re just taking little chips. Try pushing down with a little more pressure and going for very shallow swipes.
These bars are trimmed nicely.

Something that is hard to see in photos: Healthy bars slope down slightly into the collateral grooves. If you recall, that’s how the laminae are situated on the internal hoof.
Angled about like this: See how the side of the collateral groove that is against the bar slopes up and out a bit?

As in the above photo, don’t dig the bars down so they are below the surface of the sole. Remember, they are hoof wall so will stand at least sole height and perhaps a little higher. They will usually slope slightly down toward the tip of the frog from the heel.
The bars should not be straight up and down. These bars need to be trimmed down a bit more, so they angle down into the collateral grooves.

These ones have been trimmed so they form an odd angle like wings instead of running along the same angle as the frog. Try to trim them so that angle is minimized, and they follow the anatomy of the internal hoof.

Now that the bars are back, you can use the hoof knife to lightly remove any flaking sole in the seat of corn. This will help you see how tall your heels are, and if they are even.
I almost never trim any sole out of a hoof except for flaking off chunks that are loose, flaking out the seat of corn before a trim, or sometimes removing some little sole lumps that form around the end of the bars. The most important area of the hoof to never remove sole is around the tip of the frog, because this is where the rim of the coffin bone is.
The next step is to rasp the hoof wall level and flat all around the hoof until there is an even amount above the sole – ideally about 1/8th of an inch. Remember to not rasp the hoof down to the white line level, but only down to the sole ridge level.
See the sole ridge in this toe? Don’t trim the hoof wall lower than the ridge.
This hoof has been trimmed below the sole ridge. It is a good way to lose sole thickness and will sometimes lead to coffin bone remodeling. Now imagine if someone had also trimmed this hoof down to get a “clean white line,” making the sole flat with the hoof wall. The protection of the sole ridge would be lost.

In some cases, it’s possible to have so much sole depth that some can be removed, especially if it is affecting the toe angle.
Pete Ramey shows this method of measuring sole depth, from the true tip of the frog to the top of the sole ridge. 1/2 to 3/4 inch sole depth is ideal.
Here is a hoof that will have too much sole.

When rasping, I always remember what my grandpa told me when I was using a file in woodshop. “It’s friction that does the work.” Don’t try to use force to get your rasp to cut; instead, run it back and forth lightly until it gets some bite and heats up a little, then rely on less force and more friction. The longer your rasp runs with each stroke, the less work you will have to do.
If your frog is thick and you can’t lay the rasp flat over the top of the heels, you can run the rasp at an angle from one seat of corn/heel to the opposite pillar area. By rotating the rasp, you can get the entire hoof.
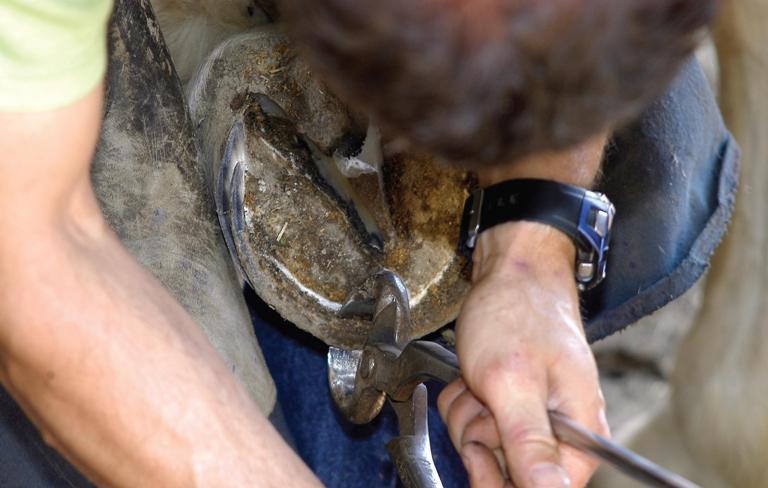
If your hoof walls are long, it will be much easier to use nippers than a rasp. It’s often easiest to start a nipper run at the heel. Just like you want to make sure your rasp is level horizontally, you also want to make sure your nipper blades are level horizontally before you cut. Also pay close attention to that sole ridge, because it is easy to want to tilt the nippers and set them at an angle starting inside the sole ridge, which will bring your hoof wall down too far.
It’s much easier to cut with the nippers if you only make each cut half the width of the nipper blades. If you try to use the entire width, you have to use a lot more strength.
When I first started trimming I thought I would not be strong enough to do it. Trimming thick, dry Mustang hooves with cheap nippers and a full width cut requires two women squeezing at the very end of the handles. The same hooves with a full width cut and quality nippers requires one woman with both hands at the end of the handles. The same hooves with a half width cut and quality nippers only requires one woman and one hand somewhere near the end of the handles. Regular hooves that aren’t super dry with a half width cut and good nippers only means a light squeeze of one hand.
You don’t want your hoof wall to angle outward, so don’t hold your nippers at that angle.
Instead, hold them horizontal so the hoof wall will be level and flat. The chances of you lining up every cut perfectly with the one before are slim (if you are like me), so don’t make your cut quite as deep as you want to go. Instead, leave a little height so you can level off that last couple millimeters with the hoof rasp.
My thought is that frogs are best left mostly alone, so I just trim off loose flaps and don’t try to make them look pretty – unless I see signs of thrush, in which case I will treat the infection and do a little extra trimming to remove infected areas.
By now you hopefully have a hoof that looks something similar to this:
Sole ridge left intact, bars trimmed, seat of corn cleaned out, and hoof wall trimmed off flat and level all around. Frog left pretty much alone.

How tall you leave your heels is a matter of evaluation of the individual hoof. We’ve discussed how a horse may never have developed a good digital cushion early in life, so may have lower heels. My advice is to look at your hoof angles, and if it appears that your toe angle is low and pointed, you should leave more heel wall so your horse can make up for the lack of height he would normally have if he’d developed a good digital cushion early in life. I don’t think it’s ideal to take every horse’s heel down almost to the sole, if this means they will have a low heel and low hoof angle.
There are studies that point to how having either an abnormally steep or shallow hoof angle affects the ligaments and make a horse more prone to injuries.
https://www.ncbi.nlm.nih.gov/pmc/articles/PMC2375746/
Regardless of your heel height, make sure the wall is nice and flat all the way back to the end of the heel buttress, at the widest point of the frog and ends at the same point on each side of the hoof. Using those ways discussed in the hoof evaluation section to sight the hoof will help. If you only need to make your heels flat but not take them down much, use the fine side of the rasp to just flatten without taking the wall down more than a tiny bit.
An important step now is to find the true apex of your frog and to measure and find out where your breakover should be. Put your hoof knife underneath the tip of the frog and lift it or cut it back until you find out where the tip meets the sole. As we’ve seen, the frog can stretch forward with the hoof and cover the sole. Where the frog and sole meet is an important hoof marker.
ELPO did studies and xrays on many hooves and created a hoof mapping protocol that works for hooves size 0-2, and the basic practical implication for many of us is that for the average sized horse, the inside edge of the toe callus should be about 1 inch in front of the true apex of the frog.

For many of us, we’ll measure that one inch past the true tip of the frog and discover that our sole and hoof keep going on and on from there. What that means is that your sole is stretched over a laminar wedge. A healthy hoof will have the hoof wall beginning right past the toe callus.
If your toe is very long, this may be a work in progress. But bringing the toe back even a little will immediately improve your breakover, your hoof angles, and creating a steeper angle will help the hoof begin to grow down more tightly connected from the coronary band. If you keep up on the trim, your next hoof capsule that grows down will be steeper and more tightly connected.

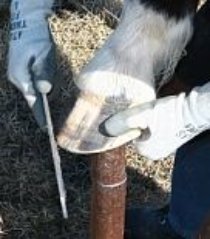
You can either bring the toe back by putting the hoof up on a stand and trimming straight down the front of the toe wall, or you can hold the hoof up from underneath and rasp or nip around the outer toe edge.
You’re bringing back the “point,” but remember to keep rasping around the front of the toe as well so you end up with a nice round hoof and not a square one.

You can also use nippers at this same angle to the wall (vertical) if you are comfortable doing so, but that is better from the bottom so you can keep an eye on the white line and only take the outer wall.
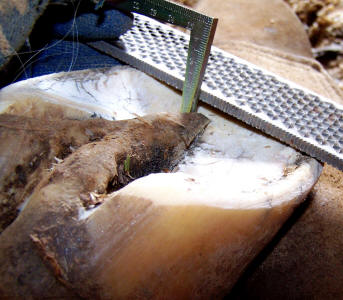
One of these radius rasps will work but it will take a long time.

If your toe is already at the right breakover and your hoof is balanced after your initial rasping down of the wall, your job is easy. Just run your rasp around the outer edge so the hoof wall is an even thickness all around the hoof, and so the edges are nice and smooth.

Your trim is done. Be sure to check for hoof balance throughout, and keep in mind the good hoof you are aiming for.
Trimming too often is not a good idea. A hoof needs time to adjust to a trim, and feedback I’ve gotten is that people who trimmed every two or three weeks ended up causing some problems such as accidentally taking too much sole. The hoof grows fairly slowly, and you will only see real changes from growth, not from taking more hoof away.
Where I live, trimming every 4-6 weeks is ideal. The hooves grow a good amount of wall above the sole, and I find it easier to stay on top of any small issues by trimming about once a month. Many barefoot trimmers feel 8 weeks is a little too long, and issues such as flaring may not be as easily corrected if you go that long between trims.
Always remember that we don’t trim a good hoof, we grow one. Even if your hoof is not ideal right now, over time with good trimming your hoof will grow down a tight and healthy hoof capsule over the inner hoof.