PART III:
Something that is very tricky about trimming hooves is that it is slightly an art, but mostly science. It is an art because you should have a good eye for shape and be able to imagine the internal structure of the hoof. But it is mainly science because it is important to be able to visualize planes, lines, flat surfaces and angles if you want to trim so the horse can move in a balanced way.
Many well meaning people have difficulty because they don’t see when a hoof wall is level versus unbalanced. Some famous trimmers say to use the sole as a guide. It is true, the sole should help us see how to trim the walls down. In the example below, the wall has been trimmed shortest at the toe, slightly longer on the right side of the photo, and very long on the left side of the photo. The bar and heel on the left side are also longer than on the right. Every time we trim a hoof, we should look at it from a few different angles. From the sole view we should be able to see the balance of the hoof as illustrated in the picture below. Our first trimming can be done from this view, taking the walls down toward the sole.

For the first part of trimming, we need to be able to see that the rasp is flat and we are taking the wall down very flat and horizontal to the sole.

We also need to be able to recognize that we should leave the wall standing just a bit taller than the highest point of the sole ridge around the rim of the sole, and not rasp into it.
Rasping down so the white line looks “clean” or without any dirt in it means that we have removed a good portion of the protective sole ridge we work so hard to grow into the hoof. It might look pretty, but trimming like this regularly will lead to removing more sole than the horse is growing.

The sole should have a groove around the edge. It should not sit flat with the hoof wall.
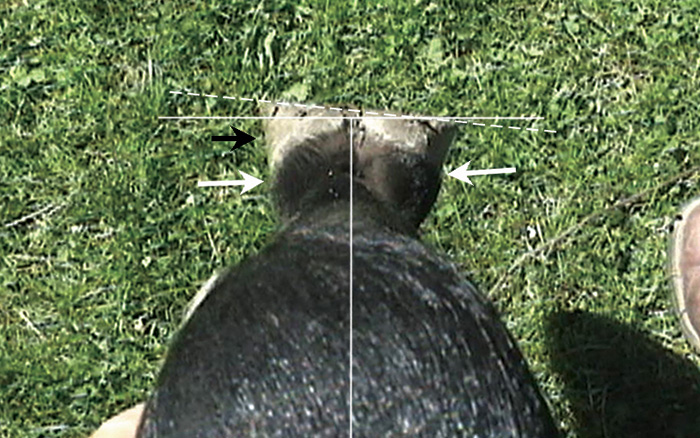
Another good view of the hoof we should look at is the T-square view. From this angle we can visualize better if our heel trim is even.
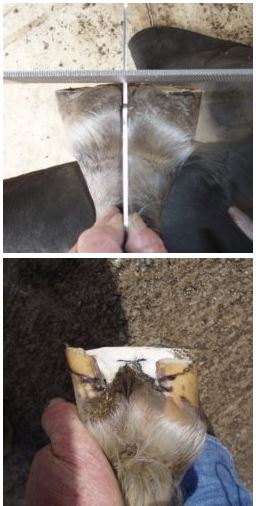
Your eye will be drawn to the hoof wall that sits above the sole. It’s important to also take a view of the entire hoof wall at the rear, from the coronary band down. As the white arrows show, this helps you see a more complete view and sometimes your heels are not as even as you thought they were at first glance.
I think this hoof has a little tilt in the joint, so it is exaggerated and the “square” line should be angled a bit more. But it illustrates the point.
This picture below shows areas to look at to help visualize if everything is in balance.

Viewed from the front, the hairline should be horizontal, and a line drawn to the ground through the pastern should have half a hoof on each side. These hooves are off balance.
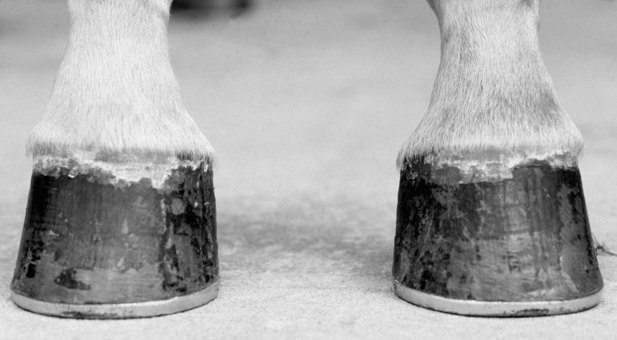
This hoof looks pretty good.
From the side view, a hoof should stand underneath the leg with the hairline going down in a slight slope from the front of the hoof to the back. There is no ideal angle, it depends on how much digital cushion the hoof has and other factors. With practice, you can visualize when hooves are within healthy angle ranges or unhealthy.
Here are a couple of hooves that have decent angles:

Notice how the slope from the coronary to the ground at the heel is similar to the slope at the toe.

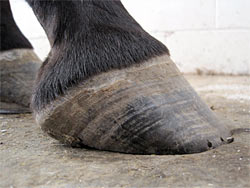
Here are some unhealthy angles:
Notice how steep the hairline is in contrast to the above hooves.

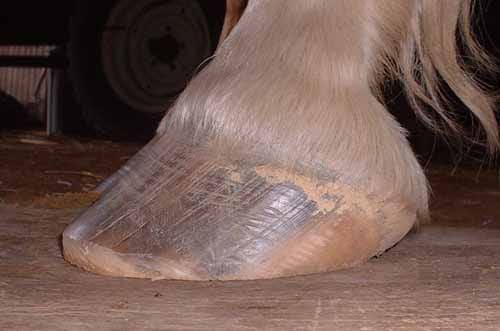

Healthy:

Unhealthy:
From the rear of the hoof standing on the ground, the hoof should look balanced and symmetrical.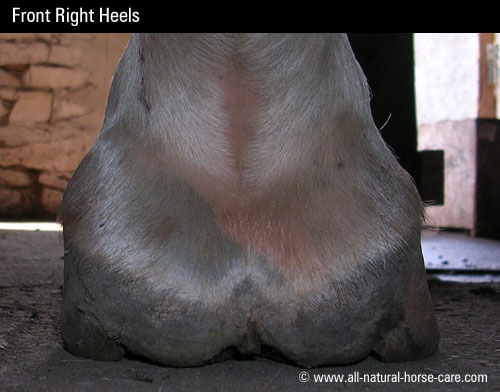
This hoof is off balance:
Something else I think about is the plane of the internal hoof versus the plane of the capsule. As seen in the illustration below, the internal hoof can be tilted one way while the hoof capsule is tilted another. Looking at the bottom and side of the hoof, I try to see if the planes appear to line up by looking at the frog plane versus the sole and/or hoof capsule plane.
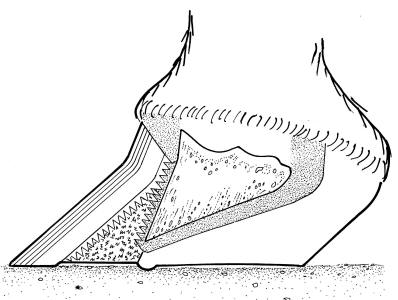
See how this frog and sole line up together.
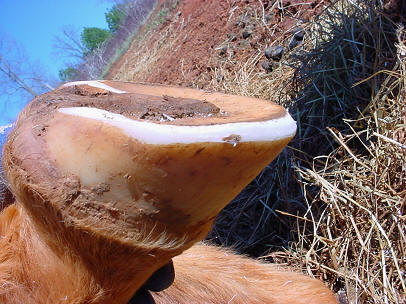
This hoof below has the frog and sole/capsule planes going off at different angles from one another. That tilt of the hoof capsule indicates an unhealthy hoof and/or improper trimming.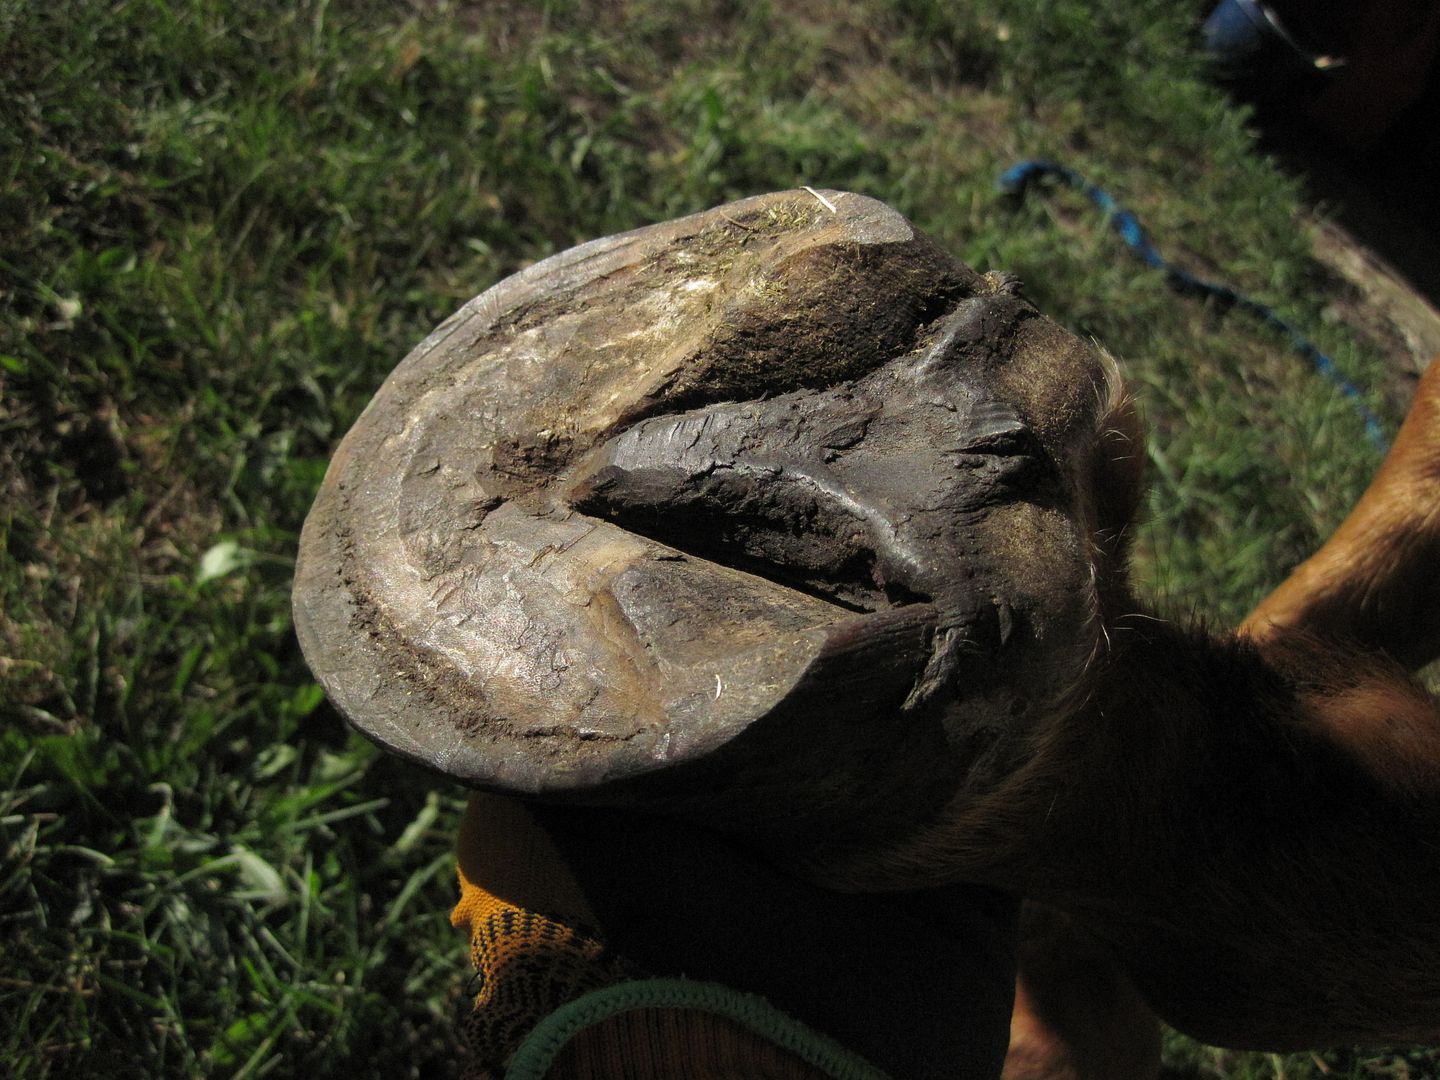
Here’s one in the process of being grown back into better angles:

Here’s another live hoof with deeply impacted bars and thrush in the central sulcus to illustrate how important it is to visualize the bars and how they need to grow on the hoof.

Anytime you see a crack going up into the live tissue the infection is that deep. You can often put a hoof pick way down inside there and see the horse flinch away because the tissue is very painful and raw. Bars are hoof wall, but someone did not trim as though they were. This frog and sole plane are at very different angles.
It’s very important to be able to see when the heel wall comes back to the same point on either side of the widest part of the frog (or very close), as illustrated below.
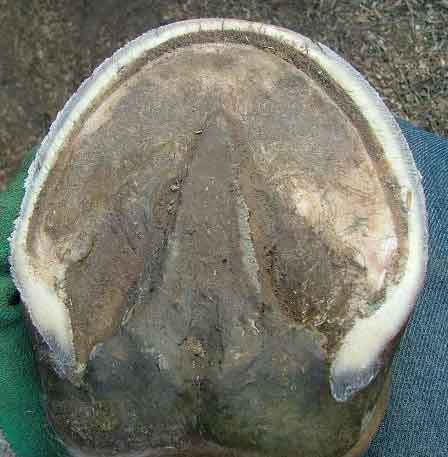
And also, the heels are trimmed to the same height.

And don’t forget those bars.

One more thing to visualize when trimming is the width of the hoof wall. After trimming the wall down, you should rasp around the outer edge of the wall to make wall the same width all the way around, just to the water line. As you can see, the outer hoof wall has been rounded off here to the water line (ignore the red arrows).
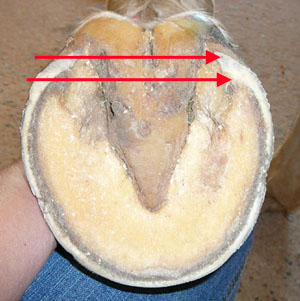
Here is a hoof that has not had the outer wall trimmed yet:

You can bevel the hoof wall around the lower edge, or just round off the sharp edges. It’s important to make sure the edge isn’t sharp enough to cut the horse’s leg if he hits himself with a hoof.

Flares of the lower third of the hoof wall can be addressed by rasping straight down the outer wall. Flares higher up will not affect hoof growth, and removing the upper part of the outer wall may weaken the hoof. Especially if there is flaring in the toe, it is important to rasp it off from the outside.

Here is a good technique for rasping flares:

